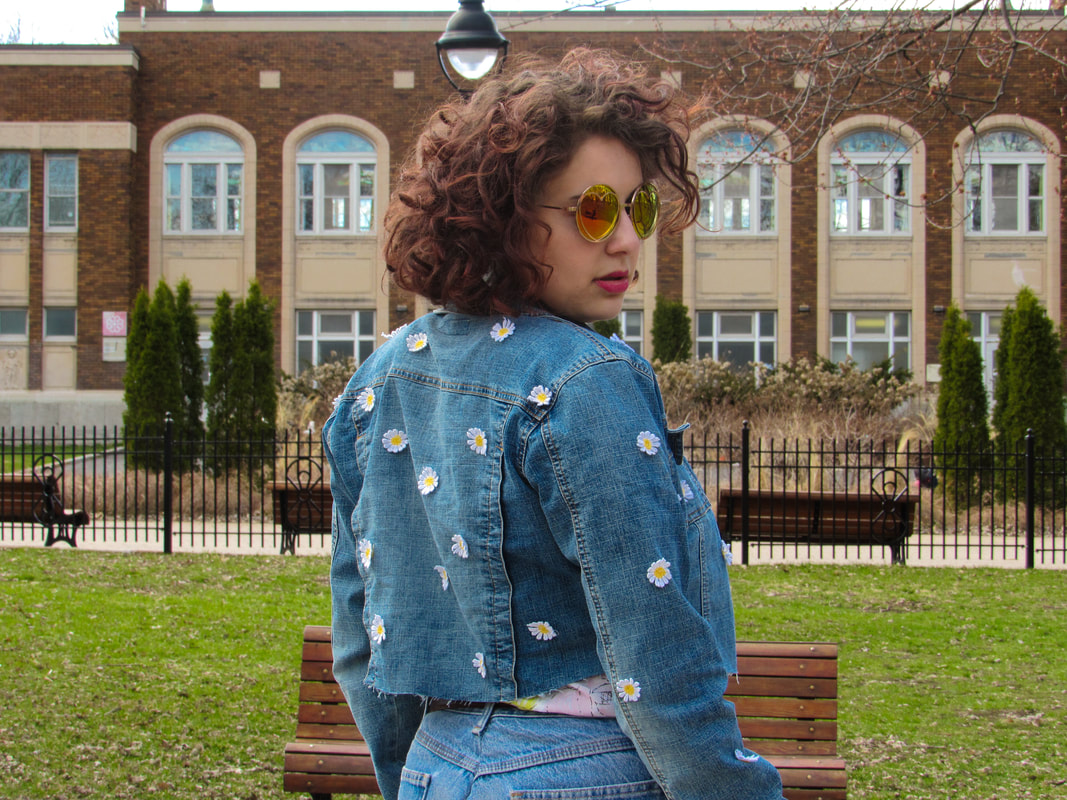
    It's finally starting to feel like spring in Montreal! The sun is out, the snow is slowly melting and people are struggling to decide whether they should be wearing shorts or raincoats outdoors. But most importantly people are finally going back to wearing bright and colourful patterns after months of heavy jackets and dark fabrics! The warm weather has inspired me to play with patterns, textures and bright styles and I decided to take a thrifted denim jacket and give it a little "spring cleaning". This DIY is surprisingly easy and beginner-friendly considering how professional the end result looks. In this tutorial I go over how to bleach denim and how I recycled a jean jacket and an old tank top to make this fabulous spring coat. So let me tell you how I turned this basic piece into a one-of-a-kind daisy jacket! Bleaching the Jacket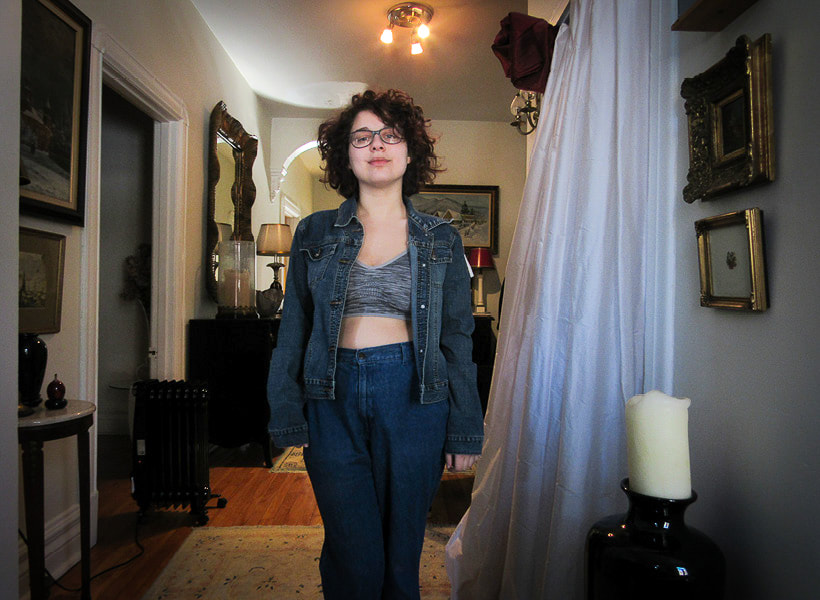 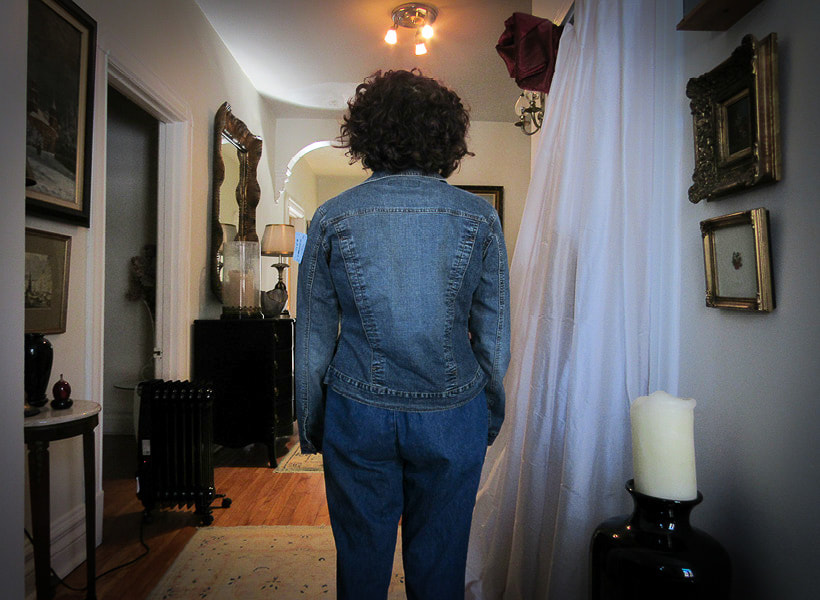 First thing's first, I needed a denim jacket. I headed over to my local thrift store and picked this dark wash coat that fit me around the shoulders, was tapered to my waist and ended at my hips. While this style is trendy and classic it didn't really like the colour or the fit. I thought I could make this a lot cuter and suited to my tastes. So I decided to alter it a little before adding the daisy appliqués. For this step I needed:
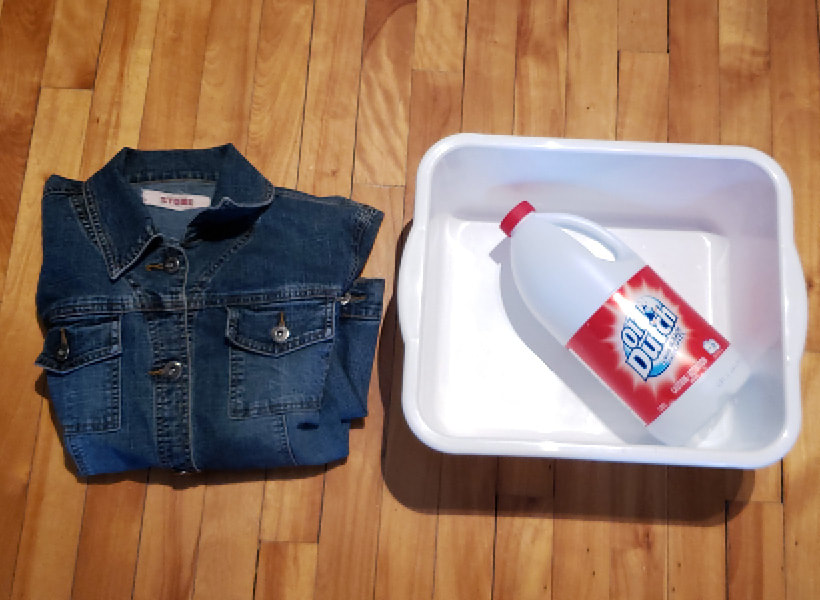 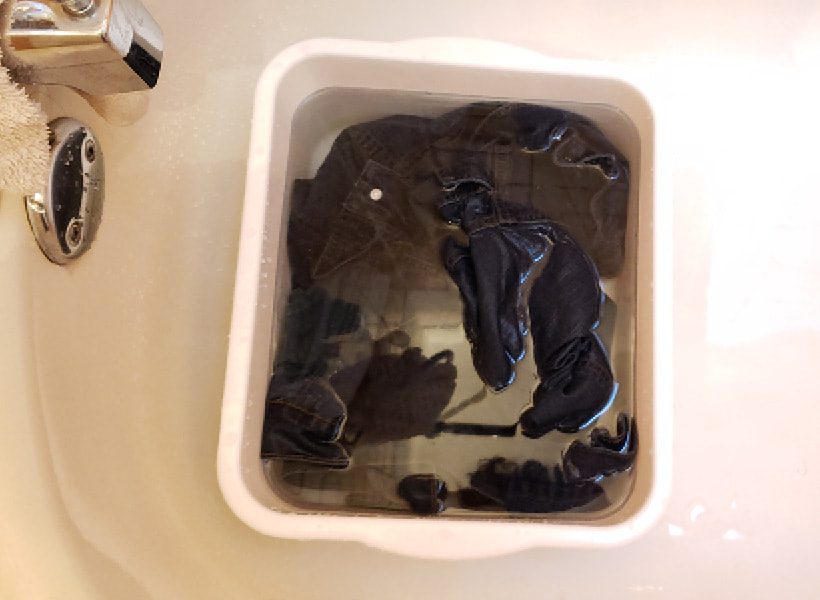 I placed the bucket in my bathtub and filled it with lukewarm weather. I then poured about a quarter of a galleon of the bleach into the bucket and stirred it all together with my hand. Make sure you're wearing rubber gloves when handling the bleach to avoid any direct with your skin. Once the bleach and the water were well-mixed, I submerged my jacket completely into the bucket. It is incredibly important that every bit of the jacket comes in contact with the water/bleach solution so that the jacket is absorbing it properly. Squishing the jacket helps to submerge it completely, thus allowing it to absorb the bleach. I checked on my jacket every 30 minutes and rearranged it in the bucket to make sure that the solution was reaching every spot on the coat evenly. Keep checking and rearranging your jacket until it achieves the wash you like. My jacket took about four hours to reach a slightly lighter wash but yours may take longer if you want a very light wash. 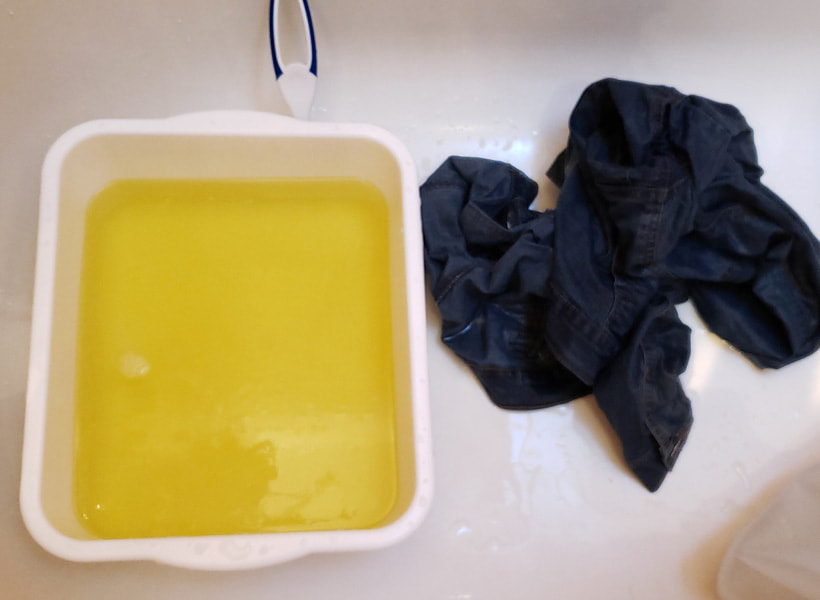 I poured the bleach/water solution down the drain (still wearing gloves) and then rinsed off the jacket in the shower using cold water. After rinsing it, I threw it in the washing machine to get rid of any excess dye. Make sure there is nothing else in the machine so that the excess dye doesn't ruin any of your other clothes or linens. Washing it will also lessen the smell of bleach, but it will disappear completely over time and after airing out a bit. 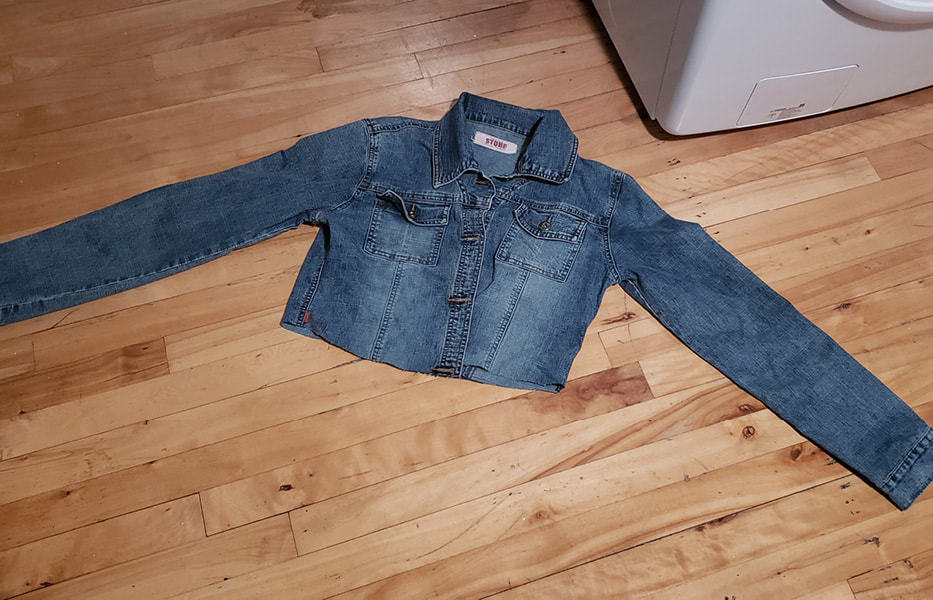 Optional Step: After the jacket was completely bleached, I decided to crop the jacket so that it would accentuate my waistline. I grabbed a pair of fabric scissors and cut straight across the jacket at the length I wanted. I also decided to leave the new hemline raw for a more worn in, frayed look but you can finish the seam by folding it up twice and securing it with a straight stitch. Decorating the Jacket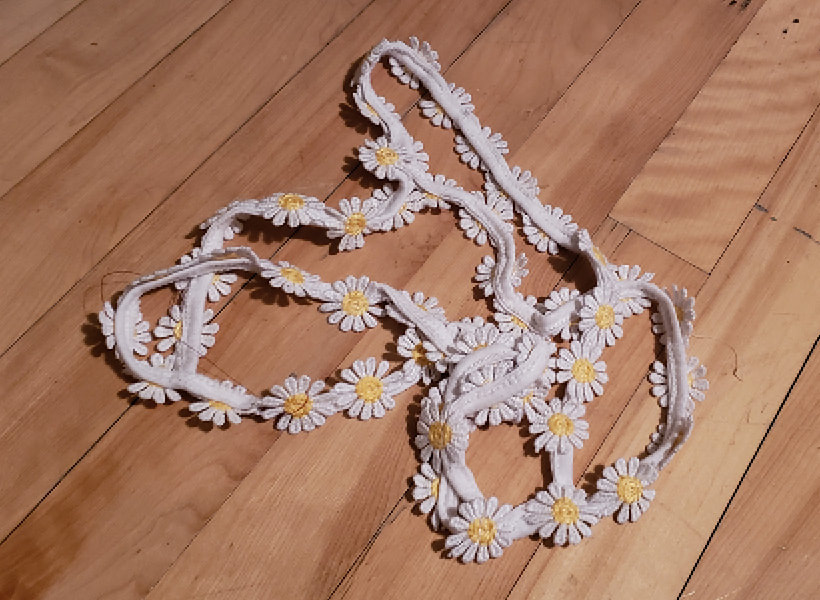 Now comes the fun part; adding the daisies! I got these daisy appliqués from an old top I found at a clothing swap. These strings of daisies were actually the top's straps. However, you can find daisy appliqués on Esty or at most craft stores. 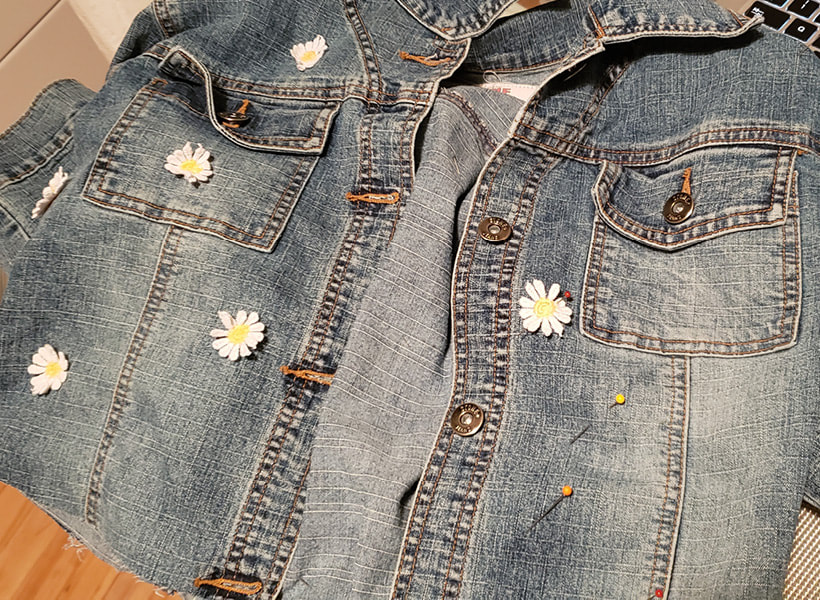 I cut the individual daisies from the straps, which gave me about 50 individual daisies. I only used about 30 but you can add more if you want more daisies on your jacket. I placed each daisy where I wanted them to sit, using pins to hold them securely against the jacket. I played around with the placement for a bit, figuring out how many daisies I liked and whether or not I wanted it to look like a more uniform or random pattern. Eventually, I ended up with a more random pattern of appliqués scattered spaciously around the jacket. I found this gave the jacket a more hand-made look, which is the look I wanted. 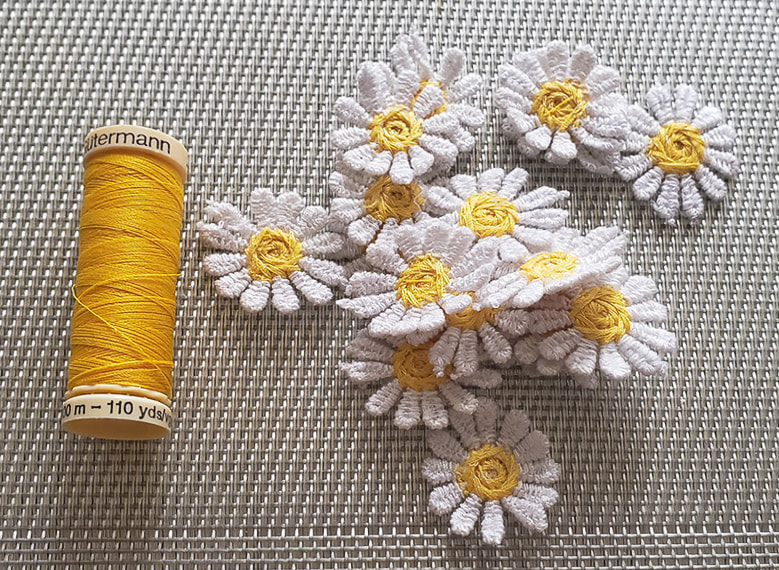 To secure the appliqués, I hand-sewed each daisy using a polyester all-purpose thread that matched the centre of the daisy appliqués. I made sure to go over the centre a couple of times to really secure it to the jacket, similar to a four eyed button. I decided to leave the petals unsecured to make the jacket more three dimensional. A quicker option would be to use fabric glue or hot glue but it would be less secure and wouldn't allow you to remove the appliqués if you ever want to rearrange or remove them. I finished securing the last appliqué, and the jacket was finished! 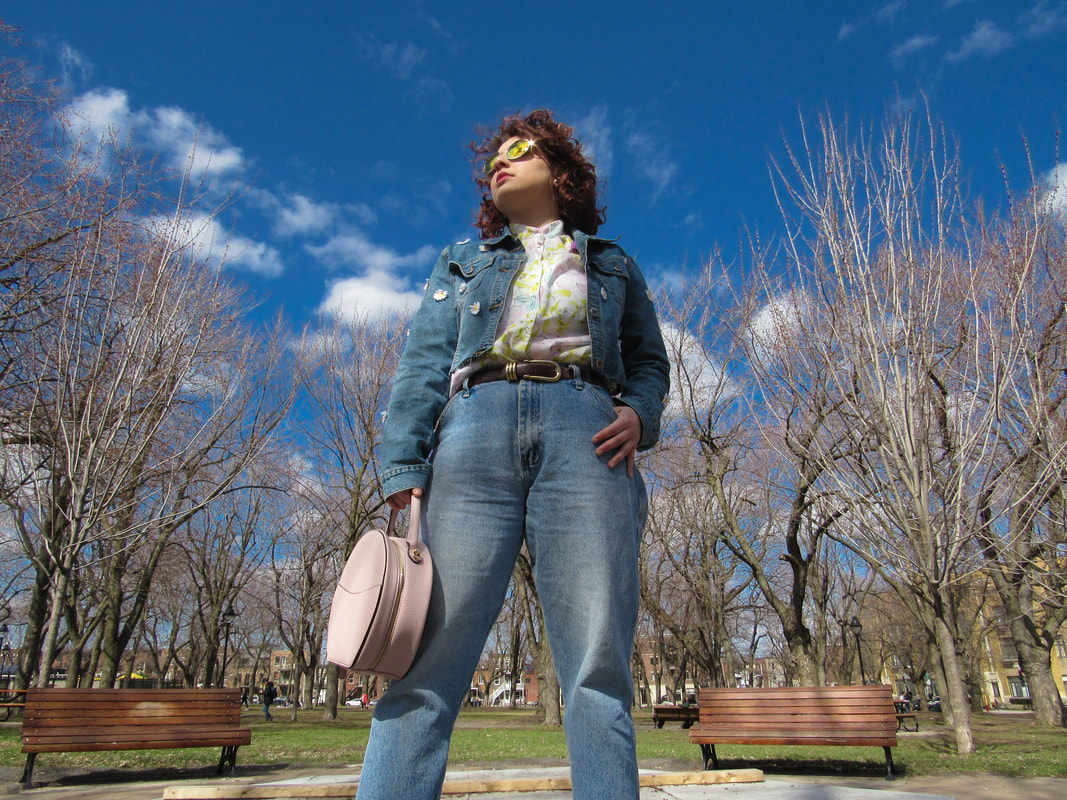 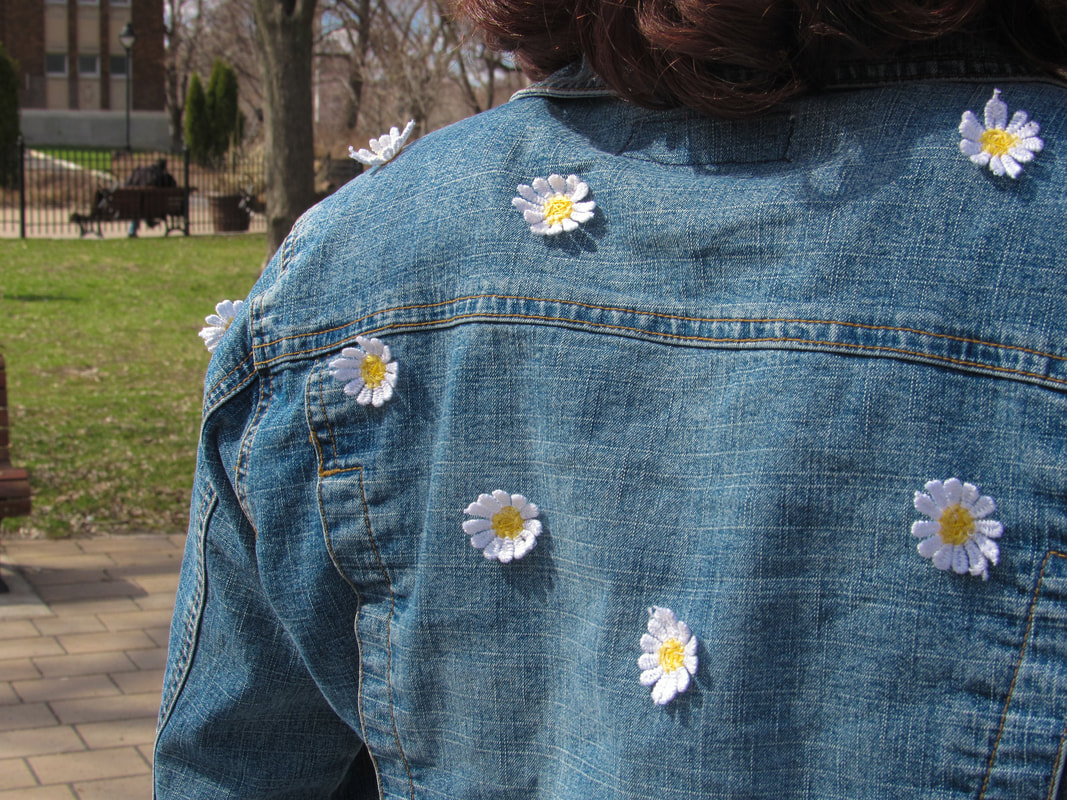 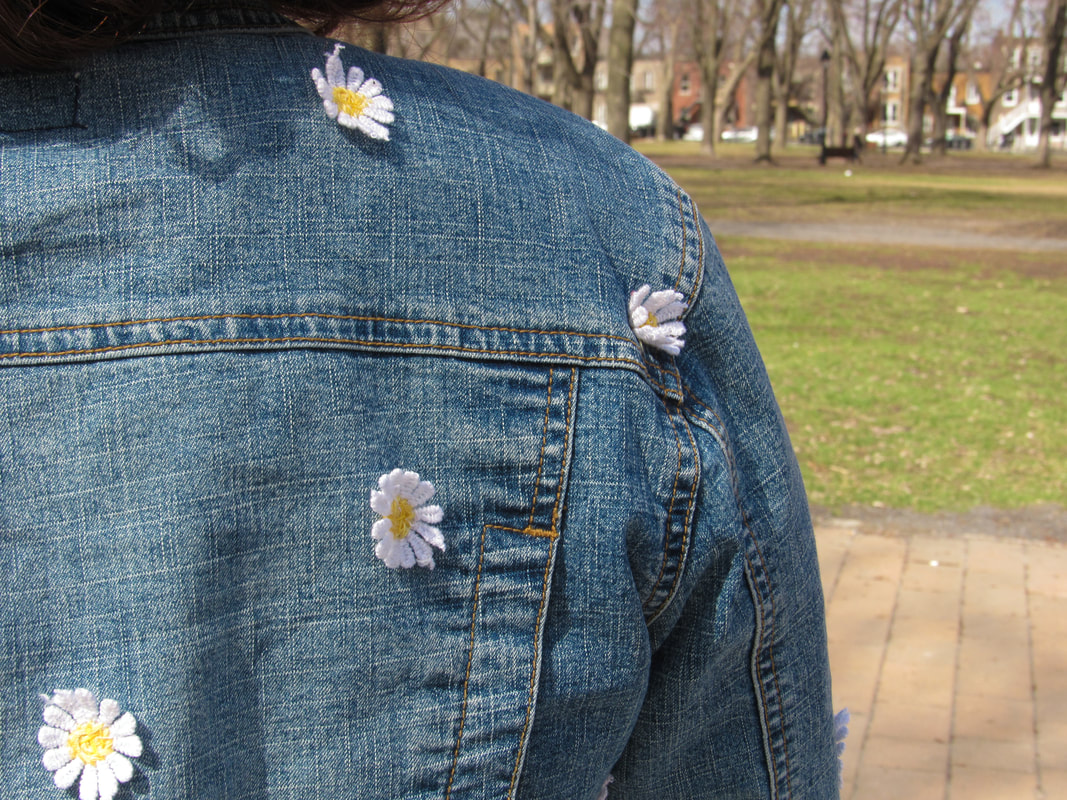 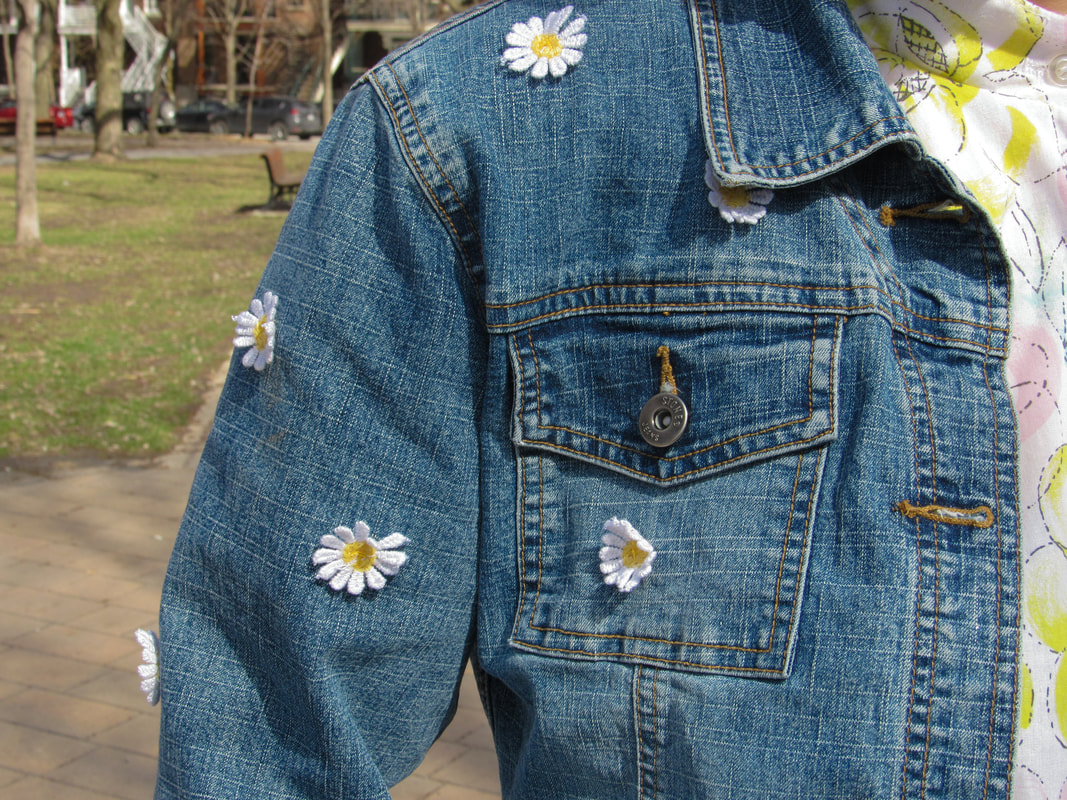 And that's it! Hand-wash your new jacket and let it air dry or use a low tumble cycle to clean it. Throw it on and let everyone admire your work! Photos by Kyra Paquet
Edited with Lightroom CC
0 Comments
Leave a Reply. |
AuthorAndrea Mestre Archives
May 2019
Categories |
 RSS Feed
